Friday, January 30, 2009
Happy Weekend!
This photo was taken by a fabulous wedding photographer {Miss Jessica Claire}, but I'm really featuring it because I can't get enough of that lace dress with the peachy-pink sash. Too, too gorgeous.
Have a lovely weekend, all! I'm off to celebrate a friend's birthday in the wilds of New York. Let's meet back here next week for a dreamy inspiration board, a Valentine's Day DIY, and a vintage wedding. Deal?
My new favorite...
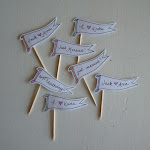
...note set. You already know I love ruffles, so it shouldn't be too surprising I found these oh-so-pretty cards impossible to pass by. The set (6 notes and 6 craft envelopes) comes neatly packaged and is available at The Paper Apartment's Etsy store for $14.
Wednesday, January 28, 2009
DIY Hair Flower
I'm a longtime fan of both Twigs & Honey and Muscari, so to help fulfill goal no. 23, I decided to try my hand at making hair flowers inspired by their beautiful creations. I was pleasantly surprised by how easy and inexpensive this project turned out to be, and would encourage anyone who's interested to make an attempt. I would suggest, however, that if you plan to order special, more expensive supplies, that you also plan to make more than one flower, which will help spread the cost around.
Here's how I did it:
1. Assemble supplies. I bought two stalks of ranunculus from Michael's, one orange variegated and one red. With a coupon, the total for both was approximately $5. I also bought small-eye guinea hen feathers from Matoska Trading Company for approximately $10 with shipping (and had so. many. feathers. left over). I added fabric glue, newspaper, faux pearls from a broken necklace, and bobby pins to the pile of supplies you see below.
2. Disassemble flowerheads. There's no particular trick to this, just pull off the back (it might take some tugging) then peel the flower apart layer by layer. The hard, green plastic parts can be discarded.
3. Create new flowers. Again, there's no rhyme or reason to this step, just play with the petals until you've got a design that's pleasing to you. For my flowers, I used three layers of orange petals and then two layers of red, making sure to offset the layers to add fullness and dimension. When you're set on a style, glue the petals together one layer at a time, starting from the back. A dab of glue on each petal in the layer worked for me. Make sure to set the glue in each layer before moving on to the next (about 30 seconds of squeezing), and to work on newspaper or a similar surface.
4. Add embellishments. Here's where you can really get creative! I used guinea hen feathers and some faux pearls as accents, but fabric leaves, dried herbs and flowers, lace, beads, or anything else pretty would work just as well, depending on what look you're going for. Glue these to the new flowerhead with your fabric glue, as well.
5. Add an attachment. Once your flower is finished and has dried completely, glue an alligator clip, a bobby pin, or a flat safety pin (brooch pin) to the back. I chose to let my friends select their backing, and most picked a bobby pin.
That's it! Once you're finished, you will have transformed your ugly, plasticky Michael's flower...
into this!
Let me know if you have any more questions, and I'll try to help!
Tuesday, January 27, 2009
Casablanca
These engagement photos have got it all: intrigue, romance, and a lovely timeless quality. I adore the vintage suitcases, her purse, her shoes, her scarf {really, her entire outfit}, and - of course - the location. Seriously, how cool is this?
All of these beauties were taken by the talented Dustin Todd. See his site here and blog here.
Monday, January 26, 2009
Vote For Me!
My vineyard inspiration board (below) is a finalist in the Style Me Pretty contest! If you would be so kind as to hop on over and vote for me, I would very much appreciate it. I'm Inspiration Board XV.
Click on this link and leave a comment with your vote!
Thank you!
{Photo by Leigh Miller Photography}
Board No. 14: Style Me Pretty Vineyard
{Click to enlarge!}
A few weeks ago on Style Me Pretty the lovely Abby asked readers to submit inspiration boards designed to help answer some reader mail. The bride in question has booked a vineyard for her ceremony and reception and decided on a raspberry and white color scheme and a shabby chic, vintage preppy feel with DIY details and surprises. I submitted this board.
The Details
First row, left to right:
Ruffly, fluttery flowers like peonies, ranunculus, and garden roses fill a bouquet fast and have an heirloom feel, while a polka-dot ribbon wrap adds a preppy touch {Brides.com}; a tiered cream cake lends charm to dessert, especially if you can get ahold of a relative's topper {Martha Stewart Weddings}; square tables with brown cane chairs and simple cream cloths become magnificent when arranged in front of a stunning vineyard view {photo by Allyson Magda via the Little Black Book Blog}
Second row, left to right:
For simple and elegant table decoration, set out glasses of delicately-hued wine at the cocktail hour or line the center of the reception tables with full bottles - tie herb springs around the necks for an added touch {Brides.com}; pearls and a puff veil lend a vintage preppy vibe {Weddingbee}; a stroll in the vineyard for portraits is an obvious choice {photo by Allyson Magda via the Little Black Book Blog}
Third row, left to right:
Hunt for vintage urns with patina at flea markets then fill them up big blooms (try hydrangea) - they can also be put to use as a guest book {photo by Katie Moos via Style Me Pretty}; dress your maids in raspberry dresses. For a handmade touch, monogram their initials on vintage linen hankerchiefs {Martha Stewart Weddings}
Fourth row, left to right:
A monogrammed umbrella adds a pop of color to portraits and is a simple DIY project {photo by Jennifer Davis Photography via Style Me Pretty}; a polka-dot tie in black and a hydrangea boutonniere echoes the bride's bouquet's wrap and flowers {The Knot}; mason jar lanterns hung with twine, another simple DIY project, can light up the reception into the evening for little expense {photo by Leigh Miller Photography via Style Me Pretty}
And lastly, besides the DIY details I pictured, I would suggest rustic wooden signs to direct guests and a sweet or savory treat to send revelers off at the end of the night (donuts and coffee, mini chocolate chip cookies and milk, or personal pizzas and vintage bottles of coke or lemonade would do the trick).
Monday, Monday
Just a lovely image I can't get out of my head to start your Monday on the right note. Inspiration board coming soon!
{Photo c/o Braedon Flynn via Once Wed}
Friday, January 23, 2009
Happy Weekend!
{Photo via i.anton's lovely Flickr photostream}
Have a dreamy weekend, my dears! I'll be back on Monday with a new inspiration board, a DIY project, and a more regular posting schedule (I promise!).
Vines, Light Bulbs,and Cardboard: Oh My!
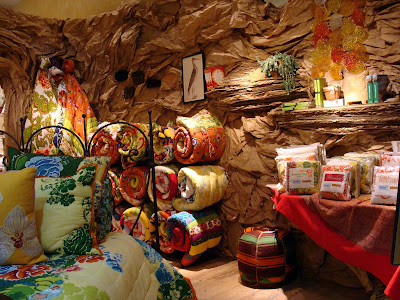
A visit to an Anthropologie is always an adventure - it's like entering another world entirely. I could spend hours wandering from display to display (let's be honest: I could spend hours gazing at the store windows!).
I can't fathom the amount of time that must go into creating such unique and elaborate displays, or the hours someone must spend hunting for all the "props" on the floor that aren't being sold: antique typewriters, old photographs and handwritten letters, scraps of ribbon and lace. I can't help wondering where it all comes from, and what they do with it after the display is taken down - host a huge yard sale? Store it in a vast warehouse somewhere? Return it to the homes of company employees?
P.S. On this visit, I escaped with just six of these lovelies. To me, they are irresistible.
Thursday, January 22, 2009
DIY Wine Charms
Before the holidays get too far behind us, I wanted to pass along a quick idea I thought up for an open house this year {of course, it's adaptable to any occasion}. I've never cared for most store-bought wine charms, and this version is simple and inexpensive to pull off.
If you're anything like me, you have a drawer full of ribbon scraps just begging to be put to use! Choose a handful that match the season or occasion and start tying - I did a simple knot for the thicker varieties and a bow for the thin.
Et voila! No more tacky - or loud! - wine charms.
If you're anything like me, you have a drawer full of ribbon scraps just begging to be put to use! Choose a handful that match the season or occasion and start tying - I did a simple knot for the thicker varieties and a bow for the thin.
Et voila! No more tacky - or loud! - wine charms.
Mr. and Mrs. Coconut
The first look of the day:
The second:
The third:
The beribboned bouquets:
I love so many details from the Coconuts' wedding on Weddingbee, especially because Mrs. Coconut rocked three separate looks on the big day. See the rest of her planning details and recap posts here.
All photos by the talented Jason Angelini!
The second:
The third:
The beribboned bouquets:
I love so many details from the Coconuts' wedding on Weddingbee, especially because Mrs. Coconut rocked three separate looks on the big day. See the rest of her planning details and recap posts here.
All photos by the talented Jason Angelini!
Tuesday, January 20, 2009
Board No. 13: Dainty Brunch
{Click to enlarge!}
This board was inspired by the raspberry punch photo in the bottom row, then filled out with shades of orange and pale blue and pink. A morning brunch or early afternoon luncheon filled with dainty, elegant details like cucumber sandwiches cut on the diagonal, small chandeliers hung from low-hanging tree branches, and cheerful bunting strung from the porch roof set the tone for this intimate bridal shower, baby shower, or birthday soiree.
The Details:
First row, left to right:
Cut up old floral or striped fabric and sew to ribbon to create cheerful bunting {Country Living}; if you're using this palette for a wedding, consider a soft, lush bouquet of pale orange, pink, and green {by Ariella Chezar}; petite, brightly colored macaroons piled on a milk glass cake stand make a pretty centerpiece and a delicious dessert {via Black*Eiffel}
Second row, left to right:
Letterpress might be out of the budget for an intimate get together, but your invitations can still include over-the-top calligraphy {CECI New York via Style Me Pretty}; vintage glass containers can be used to hold a variety of berry-infused lemonades or iced teas {photo by Sarah K. Chen}; set out papers and stickers in coordinated colors for a memorable guest-book {Martha Stewart Weddings}
Third row, left to right:
A vintage croquet set is an excellent after-lunch diversion {photo by Jose Villa}; fluffy, ruffly flowers like dahlias, ranunculus, peonies, and vintage roses look marvelous in simple mason jars {Country Living}; serve light food and take time to display it carefully, as with this salmon and spring pea side {photo by Francine Zaslow}; start collecting vintage embroidered hankerchiefs to pass out as favors at the end of the day {photo by Lifework Images via Style Me Pretty}
Fourth row, left to right:
A twisted ribbon adds extra panache to a simple favor box {Martha Stewart Weddings}; serve punch in a vintage bowl - be sure to throw in plenty of pretty sliced fruit {via Classic Bride}; hang vintage chandeliers from low-hanging branches for shabby chic ambience {photo by Katie Moos via Style Me Pretty}
P.S. Sorry this is a day late!
Friday, January 16, 2009
Happy Weekend + Lemonade
{via All Stripes}
What I wouldn't give for a tall glass of lemonade {especially served out of a chic bottle} on a lantern-lit porch instead of bitter cold and snow. Such is life in New England, I suppose.
Wishing you a warm and relaxing weekend, my dears!
Thursday, January 15, 2009
House of Telsa
I'm loving these hair pieces by House of Telsa. I think they'd be fantastic for a daring bride, but, as the website says, life is a special occasion... accessorize accordingly.
For Christmas, J's sister gave me a darling {but somewhat daring} headband with clusters of chiffon flowers. I've had success wearing it with otherwise basic, neutral outfits, and I think the same would work for these lovely pieces.
Take a closer look here:
pink and gray fascinator
bow headband
mustard silk headpiece
petal pink rosette headband
Tuesday, January 13, 2009
Soft Neutrals
Organizing Bathroom Drawers
In the spirit of the ever-popular resolution to finally get organized, I'm answering some reader mail today. It happens to come from my sister, who recently moved into a new apartment with a tiny bathroom and no medicine cabinet. There are drawers under her sink, but she isn't sure how to organize them for maximum effectiveness. Here's my advice:
First, if her {or your} collection of toiletries is anything like mine, it could stand to be pared down: get rid of what you don't use, including (especially!) lotions and potions you've kept around because you might change your mind in the future. Then, sort what's left so you'll be able to plan out your storage solutions more logically and effectively.
Once that's done, the fun begins! The best part? Unlike some household projects, drawers are easily organized without purchasing fancy equipment or devoting an entire afternoon to the task. For example, one of my favorite catch-alls is the humble ice cube tray: its many hollows corral earrings, odd buttons, bobby pins, hair elastics, cotton swabs, rings, and safety pins in a flash.
Muffin tins and mini loaf pans serve the same purpose and work particularly well for slightly larger items.
{L: Martha Stewart Living, R: Real Simple}
The ubiquitous desk organizer plays nicely in the bathroom, as well. So does a flatware caddy like this one.
{Domino}
If you're making a purchase, look for a clear storage container with adjustable compartments, like this one below, or this one or this one.
{Real Simple}
For bonus points when working with a deeper drawer, lay down a system of compartments as above, then install tension curtain rods as a track for a second layer of drawers to slide along. Martha gets the credit for that one. Or, buy a system here or here.
{Martha Stewart Living}
If you're really looking for customization or have some oddly-sized items to store, consider slice and fit acrylic dividers, available from lifestylesystems.com. I don't have any personal experience with them, but again, Martha seems to be a huge fan.
{Martha Stewart Living}
A few more suggestions for general bathroom organization:
If space is truly at a premium, consider installing a shelf over the door. Instructions here.
{Martha Stewart Living}
Hang shallow shelves {often seen in kitchen pantries} to the insides of cabinet doors to create storage space out of previously underutilized space. Get one here.
{Domino}
Corral prettier or more frequently used toiletries on a decorative tray or platter for the counter top. The tray makes cleaning easier, as well.
{Martha Stewart Living}
Consider using a wicker, woven, straw, or airy plastic basket to hold clean towels instead of storing them under the sink.
{Domino}
{Domino}
And lastly, a few of my favorite organization resources to get you started:
Stacks and Stacks
The Container Store
Ikea
Target
cb2
Good luck with those drawers! It's absolutely worth the effort. {Just remember to keep everything in the place you make for it, once it's got a spot.}
First, if her {or your} collection of toiletries is anything like mine, it could stand to be pared down: get rid of what you don't use, including (especially!) lotions and potions you've kept around because you might change your mind in the future. Then, sort what's left so you'll be able to plan out your storage solutions more logically and effectively.
Once that's done, the fun begins! The best part? Unlike some household projects, drawers are easily organized without purchasing fancy equipment or devoting an entire afternoon to the task. For example, one of my favorite catch-alls is the humble ice cube tray: its many hollows corral earrings, odd buttons, bobby pins, hair elastics, cotton swabs, rings, and safety pins in a flash.
Muffin tins and mini loaf pans serve the same purpose and work particularly well for slightly larger items.
{L: Martha Stewart Living, R: Real Simple}
The ubiquitous desk organizer plays nicely in the bathroom, as well. So does a flatware caddy like this one.
{Domino}
If you're making a purchase, look for a clear storage container with adjustable compartments, like this one below, or this one or this one.
{Real Simple}
For bonus points when working with a deeper drawer, lay down a system of compartments as above, then install tension curtain rods as a track for a second layer of drawers to slide along. Martha gets the credit for that one. Or, buy a system here or here.
{Martha Stewart Living}
If you're really looking for customization or have some oddly-sized items to store, consider slice and fit acrylic dividers, available from lifestylesystems.com. I don't have any personal experience with them, but again, Martha seems to be a huge fan.
{Martha Stewart Living}
A few more suggestions for general bathroom organization:
If space is truly at a premium, consider installing a shelf over the door. Instructions here.
{Martha Stewart Living}
Hang shallow shelves {often seen in kitchen pantries} to the insides of cabinet doors to create storage space out of previously underutilized space. Get one here.
{Domino}
Corral prettier or more frequently used toiletries on a decorative tray or platter for the counter top. The tray makes cleaning easier, as well.
{Martha Stewart Living}
Consider using a wicker, woven, straw, or airy plastic basket to hold clean towels instead of storing them under the sink.
{Domino}
{Domino}
And lastly, a few of my favorite organization resources to get you started:
Stacks and Stacks
The Container Store
Ikea
Target
cb2
Good luck with those drawers! It's absolutely worth the effort. {Just remember to keep everything in the place you make for it, once it's got a spot.}
Subscribe to:
Posts (Atom)